Caramelizing sugar with an oven

Deep, dark, caramelized sugar, just a touch before burning, taste wonderful. But getting the sugar to that point can be tricky. When I go without caramelizing for a while, I always feel unsure that I will be able to get the sugar to that perfect brown color. In those cases, I resort to a technique that is a bit slower, but foolproof (well, almost). In this post I’ll describe the method. In a later post I will provide a recipe.
The idea is to start the caramel on the stovetop and then move it to the oven. Sugar will start to caramelize at about 155°C (310°F) and by the time it gets to 180°C (356°F), it’s burnt and the future of your pot dubious. The stovetop is much hotter than 180°C and the sugar will go rapidly from amber caramel to burnt. But if the heat source is at the dark brown caramel stage, then there is no way to get it hotter and it will not burn.
There are two techniques for creating caramelized sugar: the wet and the dry, depending on whether one starts with or without water in the pan. Most cookbooks and blogs recommend the wet method, using a candy thermometer attached to a heavy, thick-walled pan to avoid hot spots and with a light colored interior (like stainless steel) to discern the color change of the sugar. I recommend all those things, but to demonstrate the technique, I will use a thin pan with dark interior and no thermometer.
Dry method
Turn the oven on and set to 180°C (356°F). Most ovens are off from their markings, so err 10 to 15°C (20 to 30°F) above the desired temperature. I set mine somewhere between 350°F and 375°F, the exact value is not very important.
Pick a pan that can go into the oven. If it has plastic handles, chance are it cannot survive oven heat. An iron skillet will work, but you will have to be careful stirring and cleaning may be a lot of work.
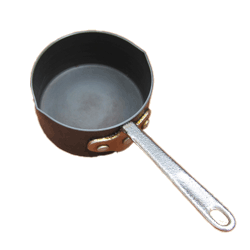
I used this small butter warmer pan. It holds about 2 cups and is made out of (dark) anodized aluminum. Not the pan to make caramelized sugar.
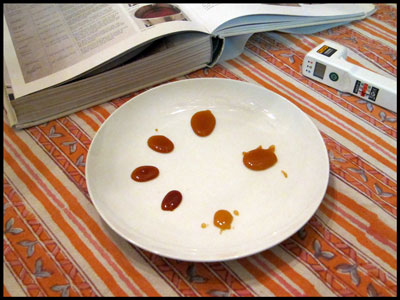
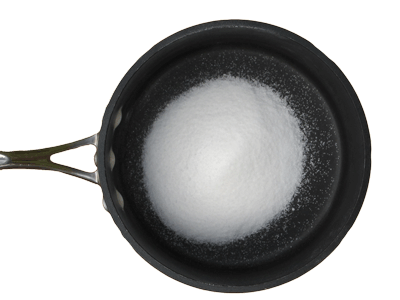
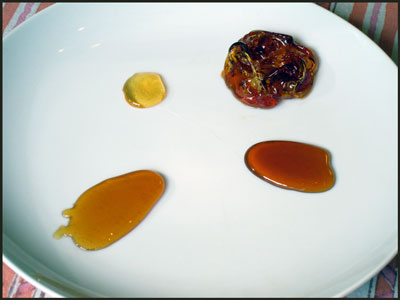
I poured one cup of sugar into the pan and added one tablespoon of water before placing the pan over medium heat. Using a wooden spoon I kept stirring the sugar, making sure that no grain remained in contact with the bottom for too long. Keep stirring until it is all liquid. As soon as it looks like all the grains have turned into liquid, take the pan off the burner and using a metal teaspoon, place some of the caramel-to-be on a white plate. It should be a light caramel color, like the bottom mound on the plate in the photograph above.
The sugar at this point is about 120°C and will scald if placed in the mouth. To avoid burning yourself, dip the spoon in a glass of water, and then lick it. Tasting will give you a sense of when you are getting close to the almost burnt stage. The sugar is stuck to the spoon and cleaning is another post (just soak it in hot water).
It is now time to place the pan in the oven. Leave it in the oven for two minutes, take it out, and pour out another spoon of caramel on the plate. If it did not change color, stir and place it back for another two minutes. You can see my pours in the photograph above. If the color changed, stir and place back for only a minute. Adjust the time between checks for your oven and pan combination, making the checks more frequent as the sugar gets darker. Stir before you place the pan back into the oven. The first few times I took the pan out of the oven, I could see that there had been very little color change, so it went back in with just a stir.
Stirring the sugar will introduce air bubbles into the caramel and give it a milky appearance. If you plan to use the caramelized sugar mixed with something else this is not a problem. If you really want it clear, first get the sugar to the right caramel point, add a bit of water, and then boil the water away on the stove top.
Wet method
For this I used a regular pan (still dark interior) and also an infrared thermometer. I find a candy thermometer a pain to have on the edge of the pan.
Turn on the oven and set it to the temperature as described above.
I placed one cup of sugar, two tablespoons of water, and one tablespoon of light corn syrup. At first, the water is not enough to dissolve the sugar, but it will dissolve as the pan heats up. The corn syrup prevents the crystallization. Don’t feel bad about using corn syrup: it is just a bit and helps a lot if you are new to caramelization.

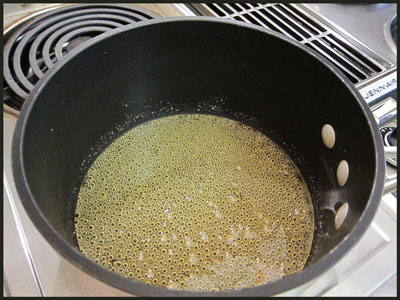
Place the pan on the burner on medium and stir until all the sugar dissolves. After that do not stir anymore. While you stirred, the walls of the pan get splashed. I’m obsessive, so I clean it with a wet brush.
The idea now is to keep the pan on the burner until all the water boils away. At about 155°C the sugar will start changing color.
Once it reaches that stage, move the pan to the oven. From now on it is slow motion for the caramelization. Using the thermometer it was easy to stop at the right stage. If you want a light caramel, stop at 165°C, for a medium, at 173°C, and for intense dark, at 177°C. Remember, no stirring.
If you trust the temperature setting of your oven you can set it at 175°C. The caramelization reaction generates heat, so the sugar will end up hotter than the oven.
The blob was just for fun (and later eating).