Stop burning those cookies
I learned a few things baking rocks. I have been trying to understand biscotti — the essential ingredients, the methods, the flavors — but I kept burning their bottoms. So I placed a few rocks in the oven and snooped around with a thermometer to get those cookies to stop burning. Earlier I wrote on what makes an oven work and what to look out for, today I list what I did to get around the limitations of my oven.
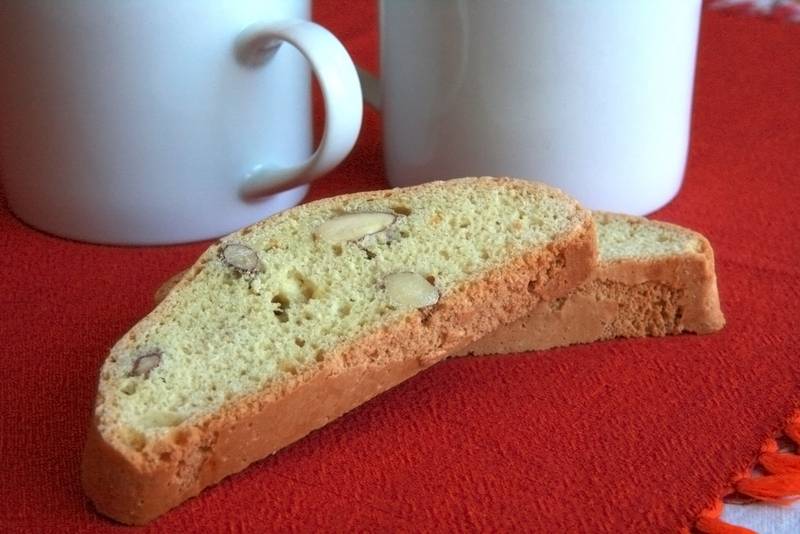
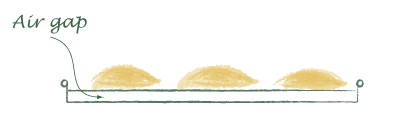
1. Insulate the dough
I did two things to protect my dough from the hot coils. First I replaced my baking sheets. My new baking sheets (US$ 3 each, what a bargain) are really two sheets of metal separated by a small gap filled with air. Biscotti baked on these sheets came much closer to my expectations, but there was still a bit too much bottom browning.
Next I placed the cookie dough on a Slipat, one of those oven-safe silicone mats. The mat is a poor heat conductor and also helps keep the dough from sticking to the baking sheet. The Slipat is a great insulator, so if your cookies start coming out undercooked, remember it may be the Slipat. For me, the air gap sheets and the mat provide most of the protection that the cookie bottoms need.
2. Rotate the baking dish
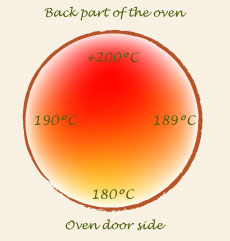
To deal with the temperature differences inside the oven, re-arrange the baking sheets. The back part of the oven is warmer than the front. There are more walls to radiate, no glass door to leak out heat, and better insulation.
Half-way through baking I take out the baking sheet, give it a half turn, and slide it back in. This way each end of the dough gets exposed to the hot part of the oven.
I try to do only one sheet at a time. Most home ovens can only handle one baking sheet full of cookies. If you use two, the lower one is going to get way more heat and at a higher temperature than the upper baking sheet. If you need to have two sheets, swap them when you rotate the sheets: the one that used to be below goes on top.
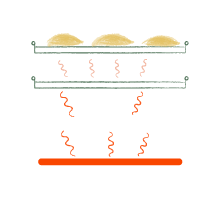
3. Shield your baking dish
The filaments or flames in the oven are much hotter than the walls of the oven. The areas in the line of sight to those heat source will get more heat at higher temperatures than the rest of the dish. For dishes, such as cookie batters and cakes, where one needs to heat the dish rather than roast it, the direct heat can be avoided by blocking the baking sheet from the direct line of sight of the coils. If you have a gas oven or a modern electric oven, chances are the heat source is already shielded.
In my oven I sometimes use another baking sheet on a rack just below the rack with the cookies. Other times, when I know I will be opening the oven door a lot, I use a baking stone. Place the baking stone in the lowest rack of the oven. Just make sure there is enough space for the air to move around it.
Any unglazed terra-cotta tile or high-temperature glazed tile will serve as a baking stone. I break my tiles often, which I replace with tiles bought for a few dollars from the local building supply store. Before they go in the oven, I put them on the outdoor grille, which gets hotter than the oven and provides a test for the tile. I will not use it if it smokes in the grille.
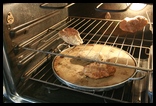
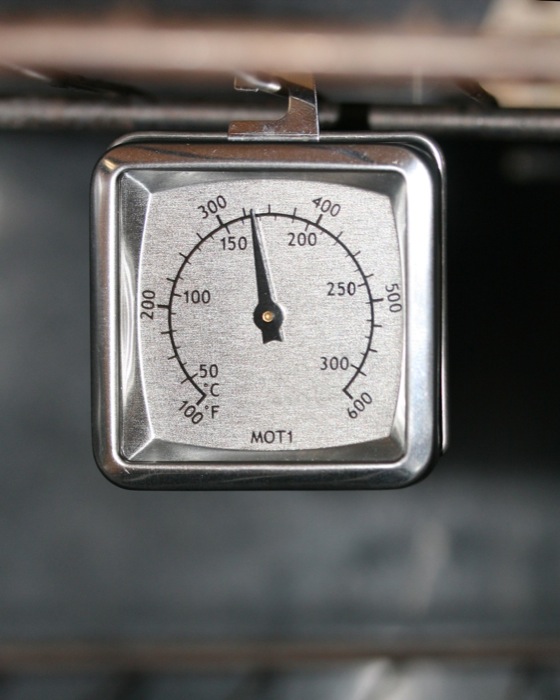
This is a baking tile I bought from a cooking store to make pizza. I placed this tile in an oven set to 170°C (340°F) for an hour and then read the temperature in several spots. The tile got much hotter than the oven setting. Even then, a bit over 200°C is much less than the 800°C or so from the coils.
Using a tile or another baking sheet will lower the temperature of the heat radiating on the bottom of your baking sheet.
4. Ovens cook differently
For the same recipe, every oven requires a different temperature and baking time. My times vary from recipe books by as much as 30%. That is not a problem if the recipe calls for 20 minutes and the cookies bake in 25 minutes, but you will have a burnt batch if the cookies were done in 16 minutes. You should use baking times (and even temperatures) only as rough guidelines.
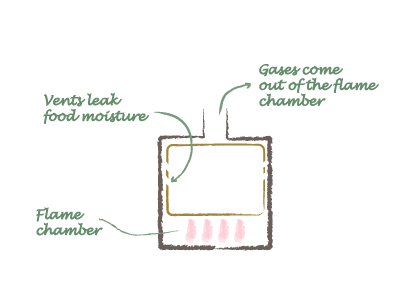
Even if you did the exact same thing as the recipe writer, cooking times would be different. Having exposed heating source in the baking area and the type of vents used by the oven introduce large variations in baking times. My old electric oven has exposed coils, whereas newer models shield the coils. In my childhood home, we had a gas oven with big vents between the flame chamber and the baking area.
These older ovens bake differently than modern home ovens (not necessarily better). Industry uses different types of ovens for different baking tasks. The best oven for making pizza is very different from the best oven for baking a cake.
5. Calibrate your oven
Cookies bake fast and small changes in temperature can take you from baked in 12 minutes, to burnt in 12 minutes. Oven thermometers are inexpensive and give you some control over your recipes. The temperature and timing in a recipe are only guidelines, so when following a recipe for the first time take notes and check often. When you bake the recipe the second time the notes will serve as a guideline. With the same oven (and chef), baking times should be reproducible.
I was surprised to discover that my 22 years old oven’s dial was off by only 25°F. By loosening two screws in the back of the oven dial it was easy to calibrate the oven.
6. Preheating times vary
Ovens warm fast but stones do not. The metal wall of the oven will warm in ten minutes or less (in an electric oven you can tell by the long off period of the element). If you have a baking stone in the oven, the stone may take over an hour to warm up. Once warm, opening the door of the oven to check on the food will let the warm air and vapors out, but the large amount of heat in the stone will help restore the temperature once the door is closed.
7. Not tested
Doughs and breads need water vapor in the initial stages of baking. Ovens exhaust the vapor given out by the dough (gas more than electric), so bread doughs expand less and cakes crack and collapse. Most professional bread baking ovens have a steam injection feature. To reproduce this at home, cookbooks suggest quickly opening the door of the oven and misting some water onto its walls. If you have a stone in the oven the temperature will recover quickly.
Cautions: Be careful with the steam that may come out of the oven. Very hot steam is invisible and will scald. Don’t squirt water directly on flames.
The steam is helpful only in the first few minutes of baking. After that it curtails the dough raise. I have yet to compare a batch made with misting water to a batch made without.